Lesson 1.1.3: Copy and bisect an angle |
For this lesson there are 7 steps for you to take. Scroll down and do each step one-by-one. The instructions under each step will help clarify exactly what you need to do, so please read all the instructions.
|
|
Here is the worksheet for Lesson 1.1.3
|
| ||
|
1.) Video: Targets and Vocab
Watch the video and copy the notes including the Lesson Number, Lesson Title, and Targets. |
|
|
2.) Video: Real World Geometry (angles and trim)
Watch this video of a carpenter who shows us how to fit trim in a tight angle. Pay special attention to how he bisects the angle. You might even want to write down the steps he takes to bisect the angle with his compass. In the next step you will be asked to bisect some angles. |
|
|
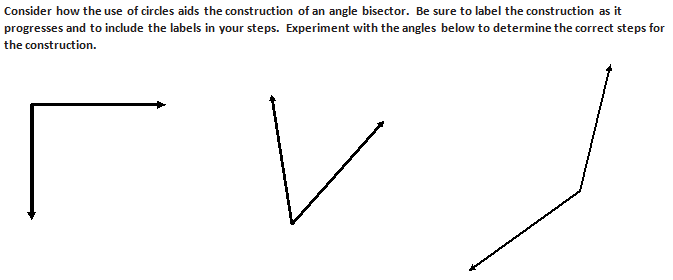
3.) Bisect these Angles
In your notes, use a straightedge to construct angles similar to the three angles shown to the right. Try to have a right angle, acute angle, and obtuse angle. After you have 3 angles in your notes that look similar to these, follow the instructions. Again, try to use the directions the carpenter gave us in the previous video. |
|
|
4.) Video: Watch me do it
Watch this video to see how I construct the angles. |
|
|
5.) Video: Steps to take
Watch me go through the steps to take when bisecting an angle. Make sure you have these steps written down. |
|
|
6.) Video: Copying an Angle
Watch me follow the steps in the correct order. If your steps were not in the correct order, make sure you change them in your notes. |
|
|
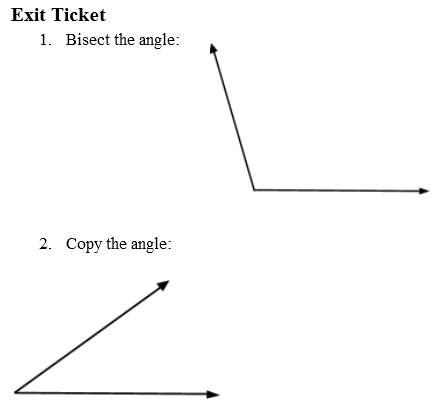
7.) Exit Ticket When you finish, raise your hand to show off your work. A high five is on its way. |
|
